Fish Tales Part 1 - "The Resurrection"
How I restored a fairly trashed Fish Tales playfield to like new condition
The story begins innocently enough - I like to restore all of my games to near new condition and I knew that most FT games had trashed playfields. Given this, I began a quest to find a NOS Fish Tales (FT) playfield. I did not own the game yet but knew that I would be buying one someday.
The search continued for a few months with no luck. I was starting to give up. During this time I happened upon someone who had a wired FT playfield, albeit used. I had not seen the playfield in person but was told that the playfield had been in storage for some time, was very dirty, but complete and looked to have no wear on the playfield. Well, was I in for a surprise.
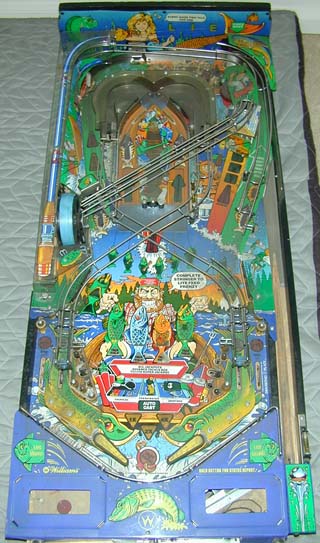
I decided to purchase this playfield and restore it. When it finally showed up on my doorstep, I was initially very disappointed. There was quite a bit of wear on the center inserts, there were some assemblies and plastics missing, and filthy does not even *begin* to describe the amount of muck that was on this thing (see below - the bottom left I had cleaned with Novus). Undaunted, I decided that I would bring this sad example of a playfield back to its original glory.
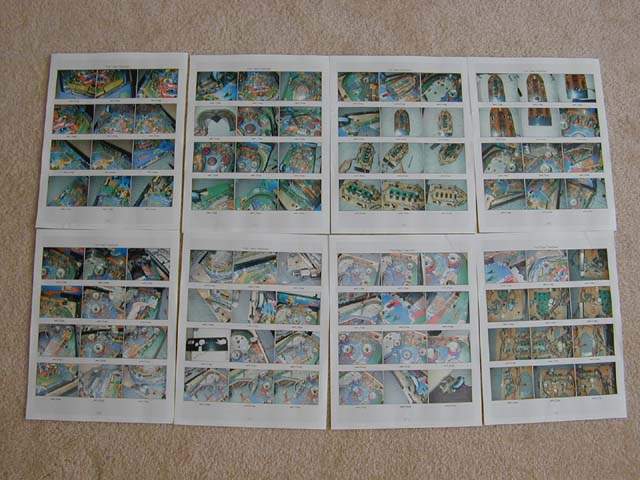
The first thing I had to do was *completely* strip the playfield of all parts. I began to approach this like all the other playfield swaps I had done in the past. Remove everything from the top of the playfield one item at a time. A digital picture was taken of every item that was removed, in order. A list was also kept that recorded the picture number, the number and type of screws used for that item, connectors that were undone, etc. The picture below is of the sheets I printed out that had thumbnails of the pictures I took during the disassembly. I could also refer to the full 1600x1200 resolution pictures I had on my computer if more detail was necessary.
Once the top was stripped, the wiring harness needed to be removed from the underside. When I normally do a playfield swap, I remove each screw one at a time from the old playfield and insert that screw into the corresponding position a few turns into the new playfield. Since I had no new playfield, a different strategy was necessary. 99% of the screws on the underside are either short (red) or long (silver) hex head screws. I used colored markers to mark the position on the old playfield of each screw. A red mark was made for the shorter red screws, and a green mark was made for the longer screws.
With all screws removed, I slid a piece of cardboard under the harness and removed the assembly as one unit. There were still some items left in the playfield, such as pop bumper studs and slide rails, so these were documented and removed as well.
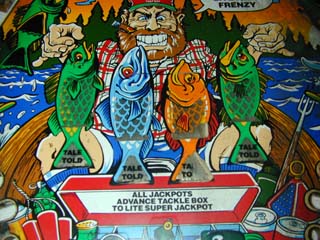
Phew! The playfield was finally bare and it looked like I had my work cut out for me. Take a look at the upper portion of the playfield.
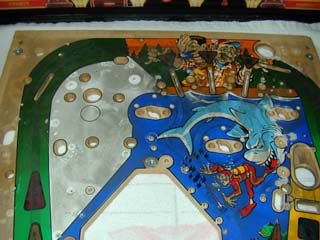
Using Novus #2, I was able to remove a LOT of the grime. But the mylars had dulled, the overall finish of the playfield was dull, and there was quite a bit of wear around the center inserts.
I removed all mylar from the playfield using the hair dryer method. I lifted some of the artwork by doing this but I knew the playfield was going to be touched up anyway. I've heard of some people using GooGone as they peel up the mylar. I will probably try that on future critical removals.
The main playfield was shipped to Kerry Stair where his friend Mark Macy (programmer of Big Buck Hunter) would do the touchup work. It would then be delivered to Bill Davis for his beautiful clearcoat treatment. The mini boat playfield was just cleaned and sent directly to Bill.
While the playfield was off being retouched and cleared, I began a hunt for parts. The Stretch the Truth spinner assembly and sign was completely missing. Some other parts had been scavenged as well. I was able to locate all the necessary parts using a *lot* of connections (this is a great hobby). I even located some parts for the "Rebirth" section of the project. Here's a partial list of what I needed -
Plastic set
Flipper rebuild kit
Spinner assembly
Plastic posts
Rubber rings
Pop bumper bodies, wafers, rings and caps
Rollover guides
Apron
Decals for reel and shooter lane
Rod plastic
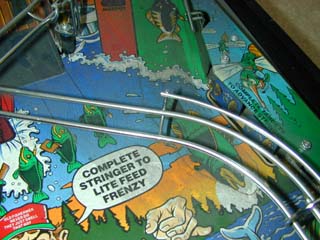
Besides buying new parts, some old parts needed to be restored as they were no longer available. The most noticeable was the center clear plastic boat ramp. The blued center flap was torn and rusted so it needed to be replaced. I already had some blue tempered shim stock and new hollow rivets so this part was relatively easy.
I then stripped the ramp of all electrical parts and proceeded to clean it with soap and water. Since the ramp was really grimy, I used a Scotchbrite pad - probably not a good idea since the ramp was left dull and hazy from fine scratches. Knowing I could probably not find a new one, I took the ramp to a friend who worked professionally with plastics for help. By passing a torch quickly and repeatedly over small sections of the ramp, he was able to remove the scratches and make the ramp look almost new again. You should have seen me sweat when he first brought out that torch! Don't try this yourself, you may end up melting your ramp!